
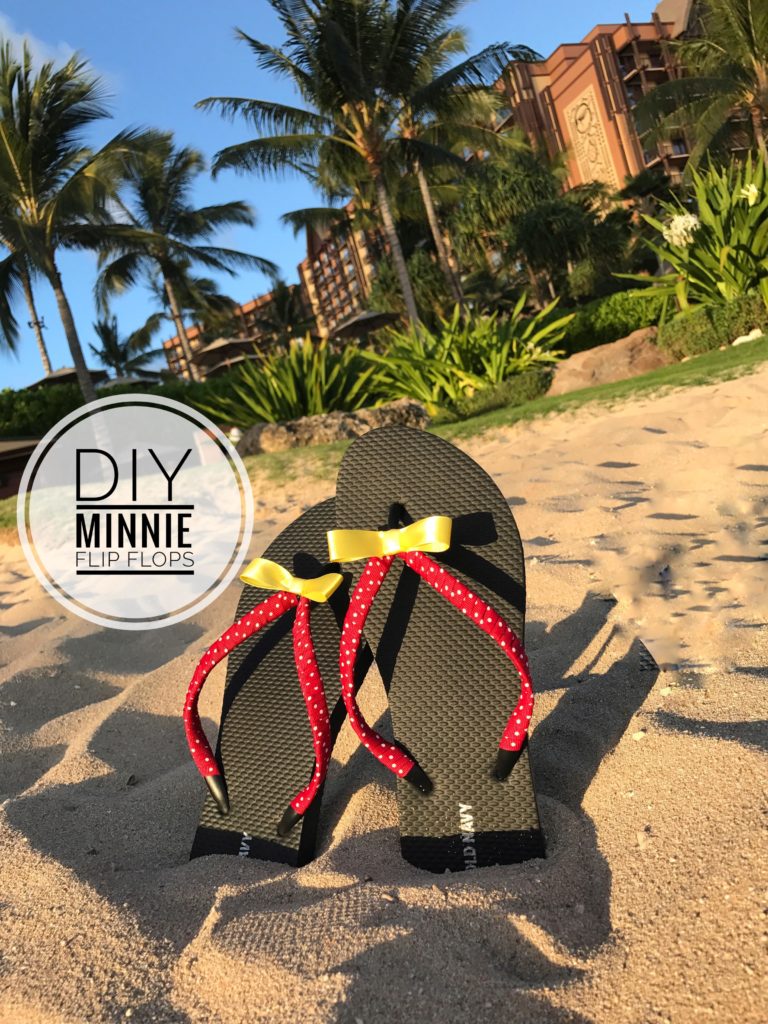
Sometimes you want to show your Disney-side without screaming it. Or maybe you have a trip planned to a Disney resort, it just seems necessary to have the appropriate colors on. Time to DIY some Minnie flip flops!
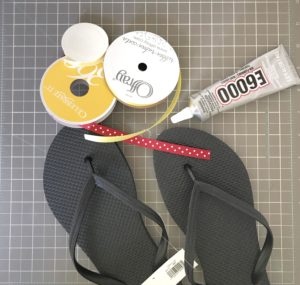
Minnie Flip Flops Supplies List
- Black flip flops
- 3/8″ Red ribbon w/white polka dots
- 5/8″ Yellow ribbon
- Glue (I used E6000 but you could easily use a hot glue gun)
- Glue dots (I used 1/2″ dots. You could go smaller, just not larger)
- A little patience
Step 1:
Glue the end of the red ribbon to the under lower side of the flip flop strap. You don’t have to start where the straps meet at the toe, the yellow bow will cover the middle connection.
TIP: Let this initial glue really dry. It will help as you wrap the remaining ribbon around the strap.
Step 2:
Wrap the red ribbon around the strap. I glued down after every 1/2 inch or so. You could glue with each wrap rotation. This is where your patience will be tested. It will look so great, you’ll want to rush. Don’t. Trust me. Unwrapping to rewrap will be more annoying than taking your time. Glue once you come within 1/4-1/2 inch of the middle strap connection. Repeat on other side.
TIP: Overwrap about half the width of the ribbon. Pay special attention to how the underside of the strap feels. You’ll want your feet to be comfortable and not up against a wrinkle in the ribbon.
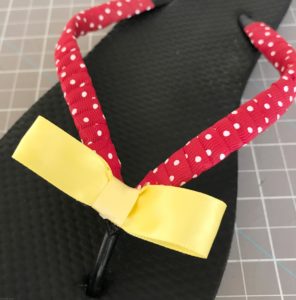
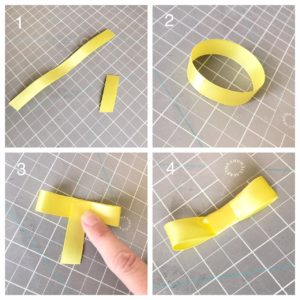
Step 3:
I cut a 6 inch length of the yellow ribbon (for adult flops). Fold in thirds, adhere with glue dot in the middle. Cut another piece of yellow ribbon enough to wrap the middle (approx. 2 inches), adhere with a glue dot.
Step 4:
Use glue gun or adhesive to glue the yellow ribbon to the middle strap connection.
Enjoy how cute your feet look in your new Minnie flip flops!
If you are interested in other DIY flip flops, check out my post on how to make baseball flip flops.
