
I love photo displays, who doesn’t. However, they do take a little planning. Below are some ideas and the materials I used. Hopefully, my photo display planning will decrease the amount you need to.
Start with an empty display screen
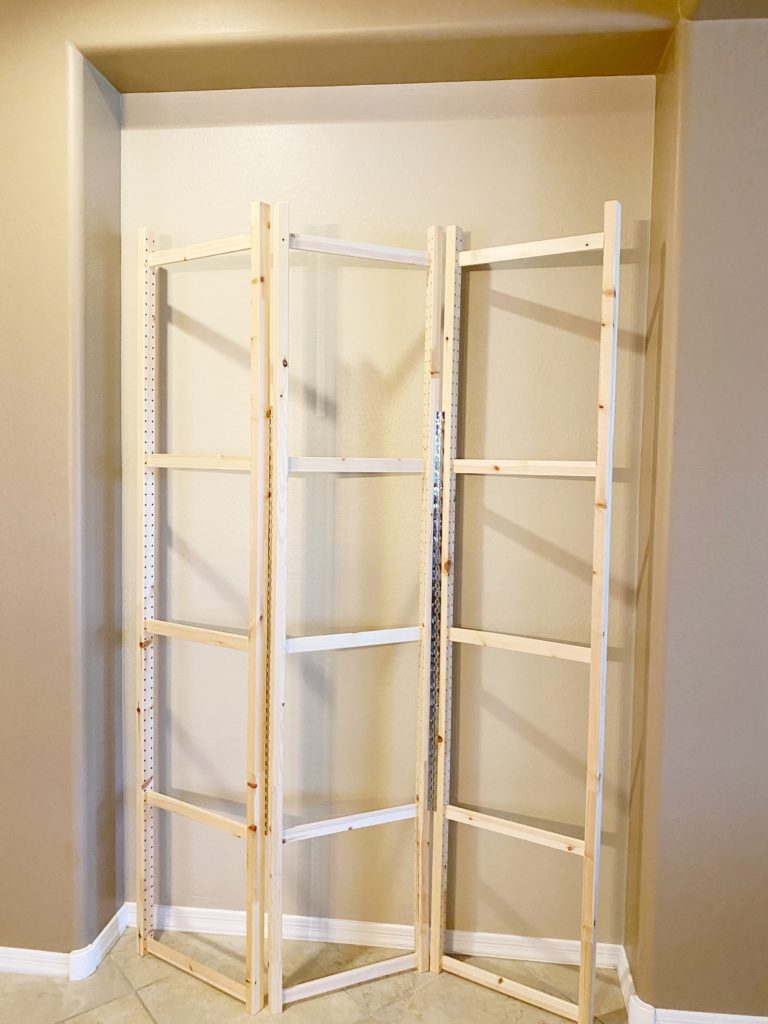
Be sure to check out the how to post on building the Photo Display Screen.
Decorating Steps:
click the links to jump ahead
Layer 1 – Background
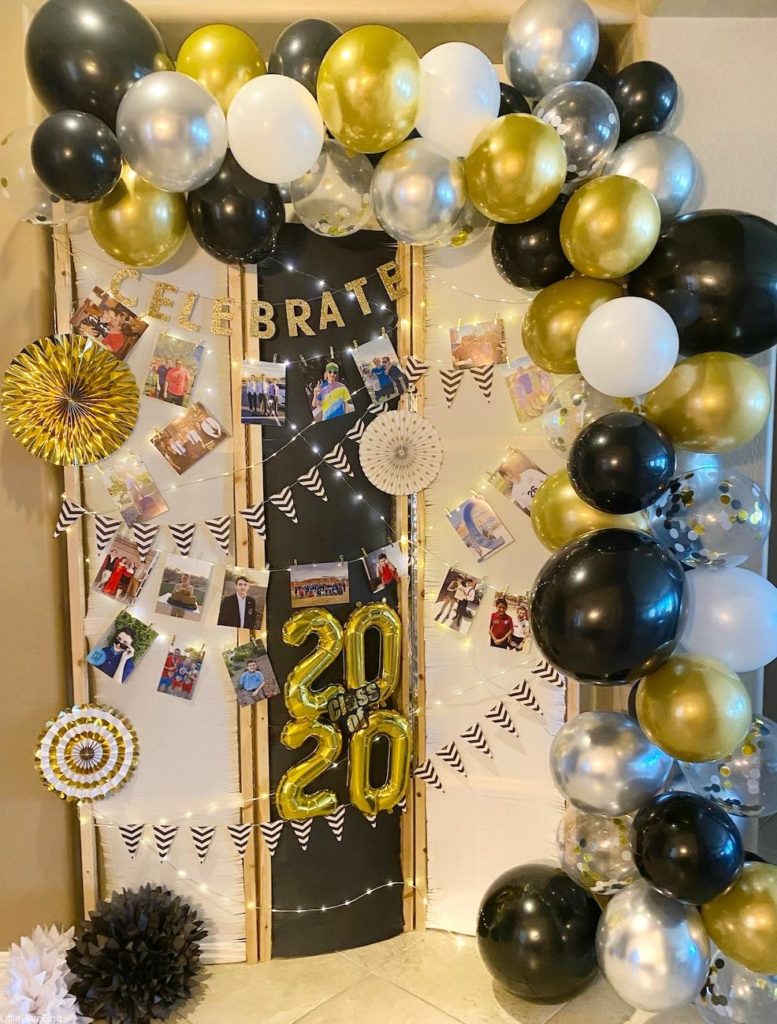
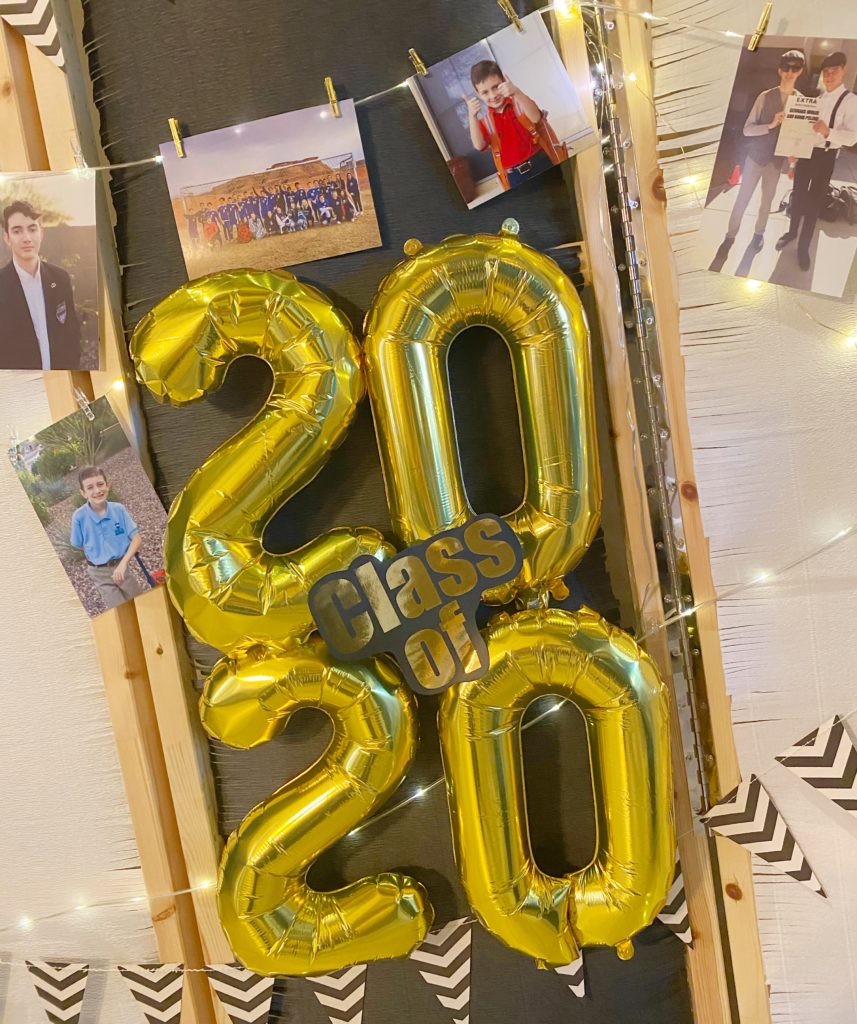
I used large crepe paper rolls as a background color to match the party’s colors. I don’t think this step is a must, but I thought it would dress up the party venue. Sadly, a global pandemic stopped that party – so my entryway got the dressing up.
Supplies
- Crepe paper rolls
- Fringe Scissors (or use good sharp scissors since the paper is so thin)
The paper was just a tad too wide for each photo display section, so I cut (don’t worry about it being perfect). Then fringed the edges to cover any less than straight areas.
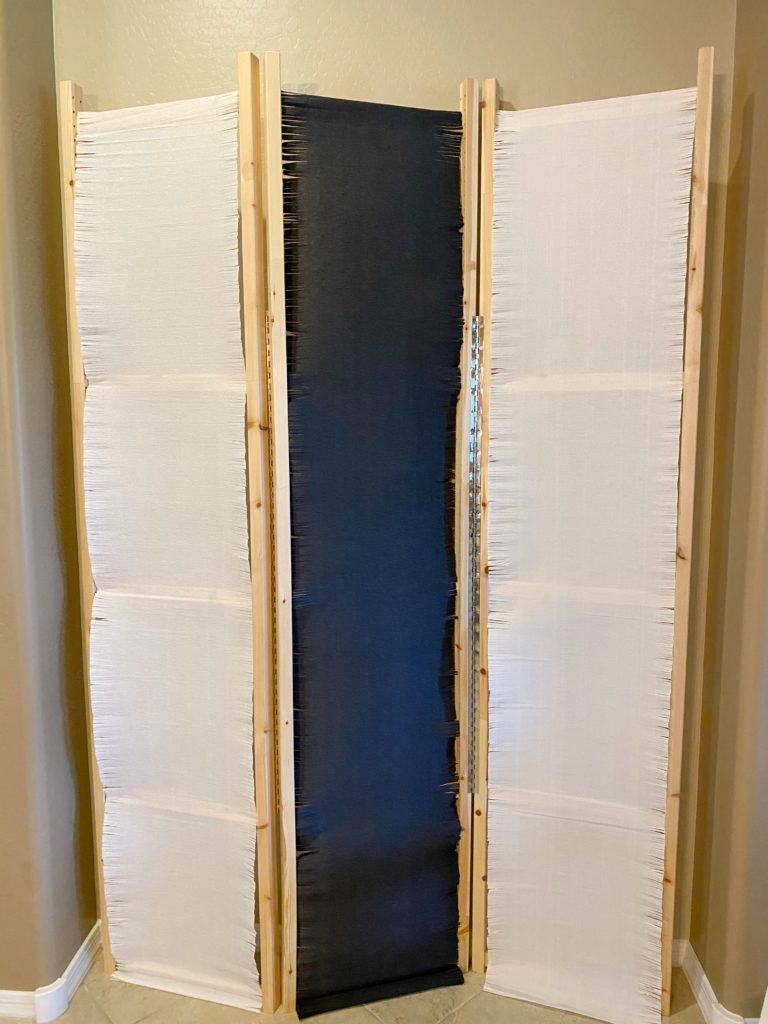
Attached to the top of the photo display section with double-stick tape which only lasted an hour or two. Thankfully the wood is soft enough you can just push pin in the top. I did use double-stick tape on the mid-sections to keep the crepe paper closer to the frame, but it may not be needed once all the lights go on. I left the bottom paper extra, just tucked it under.
Layer 2 – Lights
I initially thought only the fairy lights with clips would be needed but I was wrong. Thankfully the clips fit both kinds of light strings. If you are going to do a display with no table in front, I would buy more than the 3-4 strings I had. My intention at the party venue was to have the photo display screen behind a table where people could drop off cards.
Supplies
- Fairy lights
- Rope lights
- Command hooks for fairy lights (nice and small)
- Command hooks for the battery packs (stronger)
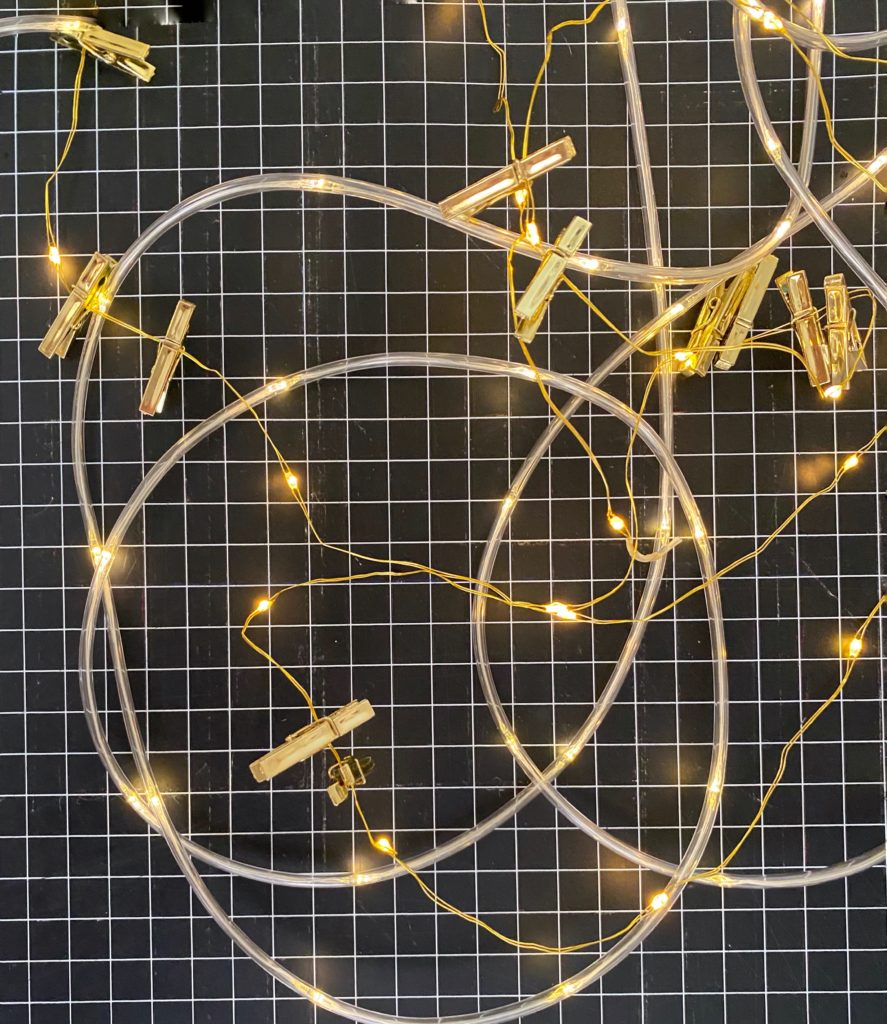
I hid the hooks on the sides or behind the crepe paper. Be sure to test if you can easily get in and out to turn the lights on/off. I had my photo display stand up for a week, so I was happy I thought ahead to where the battery packs should go for access.
Layer 3 – Decorations
You could certainly fill the space with photos only but I wanted to give some extra dimension so banners, fans, mylar numbers, etc. I found and added.
Supplies
- Celebrate banner
- Pennant banner (in case the Mind’s Eye one sells out, trusty Amazon can assist)
- Fans (also try Target)
- Mylar numbers (or Target)
- Tissue paper pom poms (some at Walmart and Target or you could make some – but this craft, I’d buy)
- Command hooks
Not going to sugarcoat it, laying out the decorations took some trial and error. Do not do the day of your event. Spend some time moving things around. You will be less stressed when the party day comes.
Layer 4: Balloon Garland
The whole reason I wanted this photo display! To make a balloon garland. I was so intimidated but there is no reason to be. But an air compressor is a must. What a big impact for little cost and not that much effort. My kind of craft.
Supplies:
- Balloon garland kit (balloons, glue dots, garland strip)
- Air compressor (the one we had in our garage – who knew? and one marketed for balloons)
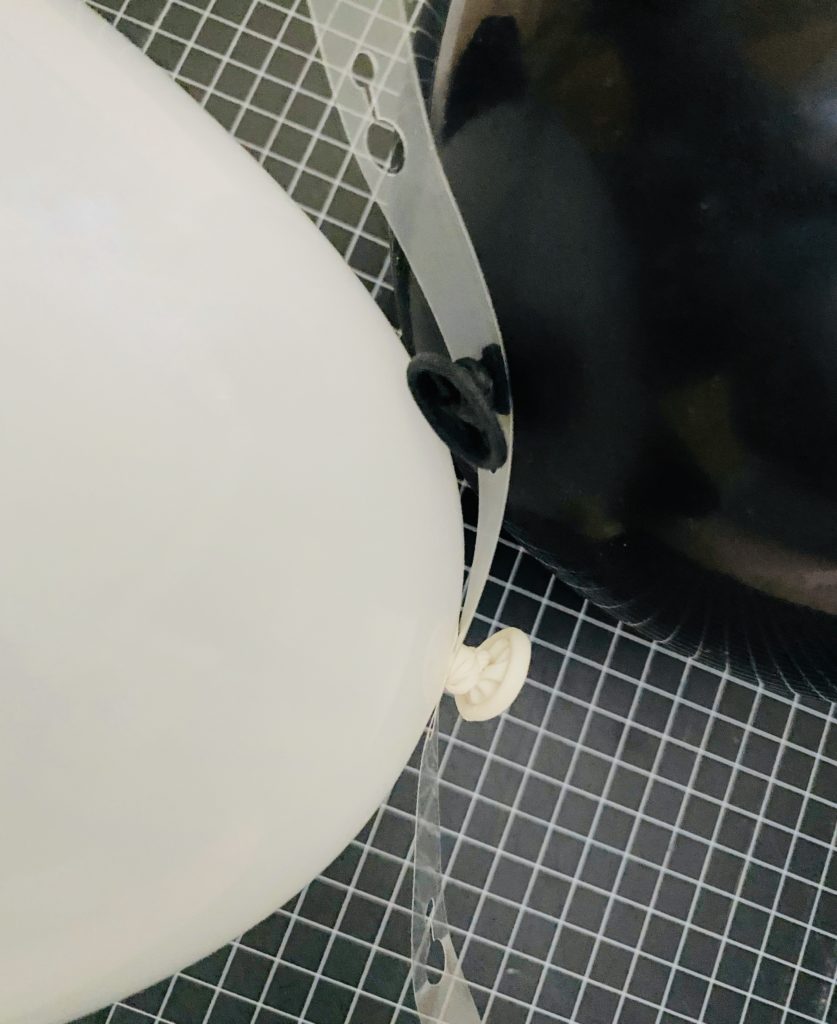
I used all but maybe 3 feet of the 16-foot strip and almost all the balloons included in the kit for this photo display. The strip has holes to put the balloons going in opposite directions every other one. For a dense garland use every hole for a more malleable garland, skip a hole between balloons.
Don’t worry, if you think you have too much of one color together – just as easy to remove the balloon and put in another hole.
We attached to the photo display with string run tied to the garland strip and then tied to the pushpins we used for the crepe paper background. It definitely takes 2 people if not 3 to get the garland attached just because it is awkward to hold.
I was so happy with the end result and will be definitely making more balloon garlands in the future.
Best of luck with your graduation photo display and Congratulations to the Class of 2020!

So much fun to see the process! Well done LBE!