I love a good crafty way to give money. Last year I made a Money Topiary but this year I took on a Money Cake.
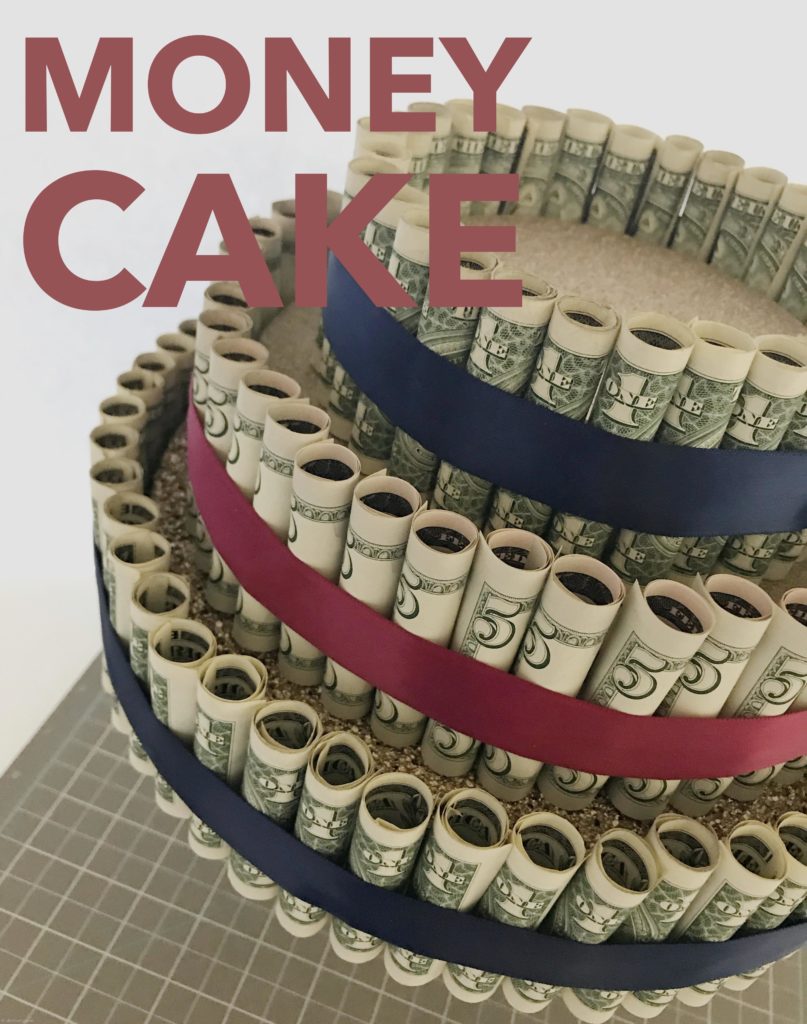
Similar to the Money Topiary, you can start early and just add the $ as you have it available. It was a little easier to count the bills needed this time. Are you ready for the total? 131 bills used. So use $5 and $10 bills wisely!
Money Cake Supplies
- Glass plate
- Glass candlestick holder
- Strong adhesive
- Floral Foam Circles in graduating sizes (I used 4.8 inch, 8 inch and 10 inch)
- Paint (I used a metallic acrylic paint)
- Money (I used $1 and $5 bills)
- Hot glue/glue gun
- Glue dots
- Clear hairbands
- Pins
- Ribbon (I used 1 inch ribbon)
Step 1
Easiest cake plate you’ll ever make. Just glue a single candlestick holder to the underside of a plate. Doesn’t have to be glass, I’m sure plastic would hold the money cake just fine.
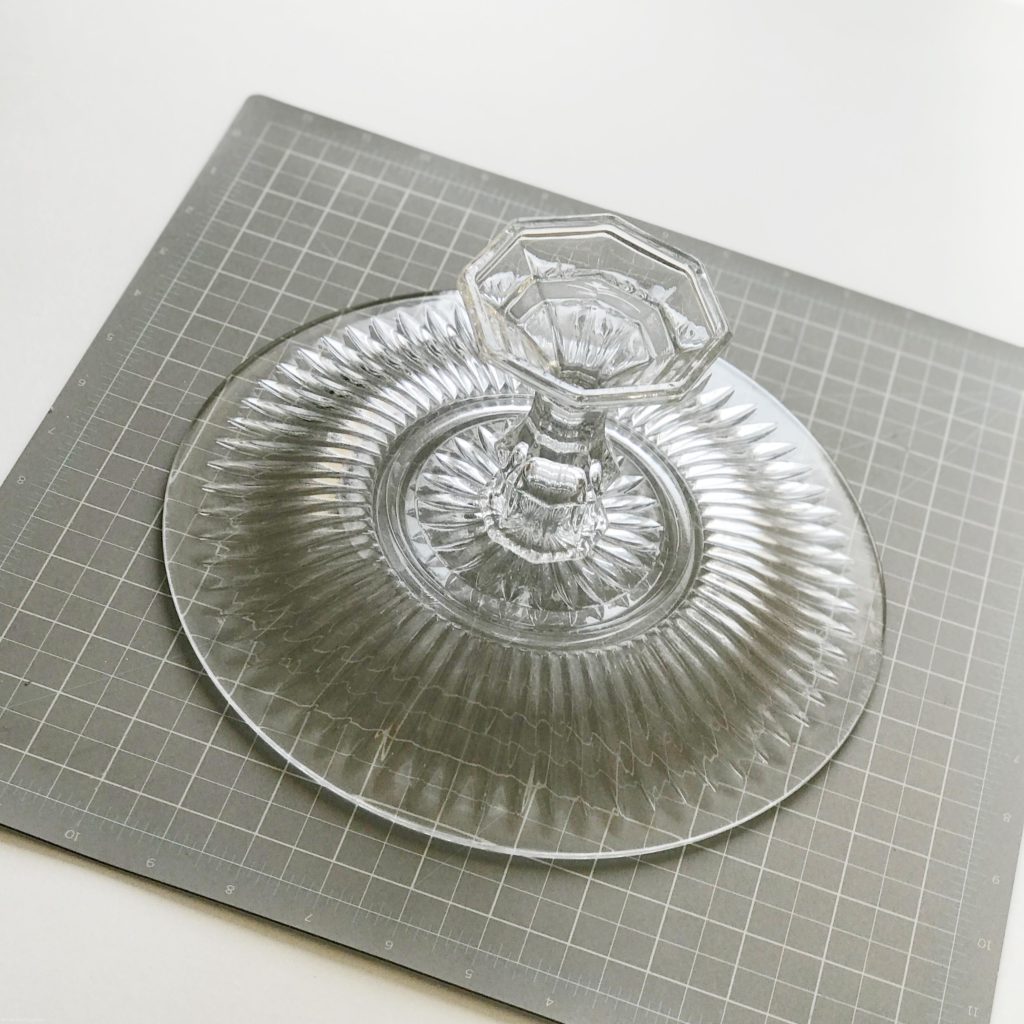
- TIP: Don’t use too much glue if using glass or a clear plastic plate as it is visible from the top if that is of concern to you.
Step 2
Painting the foam. I used whatever paint I had on hand. But test your foam circles to see if the paint will eat away at your foam first. The good news is you don’t have to paint the entire circle. Only the top will show!
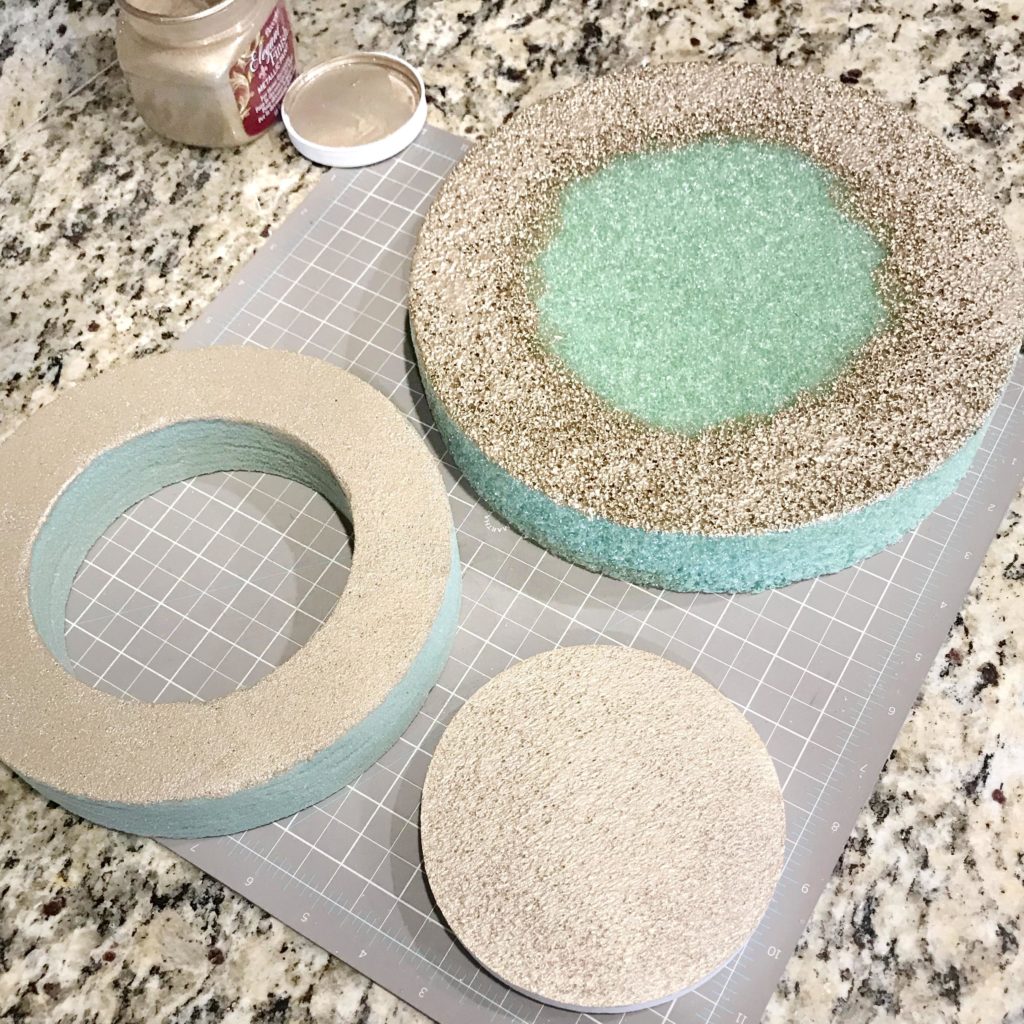
- TIP: I used a foam wreath because it was the right size and still covered enough to glue together.
Step 3
Glue the foam rounds together. I used hot glue and probably looked ridiculous trying to stand over the circles to get in the exact center.
- TIP: If you are having a difficult time finding same height circles, glue two thinner ones together. I ended up doing and you can’t tell once done.
Step 4
Start rolling the dollar bills. Your choice to do all at once. I did one at a time in an effort to keep them even. I didn’t succeed 100% but the good news is you can take out and redo easily.
- TIP: Poke the pin through the inner part of the clear band first, then roll the bill. Without the clear band, you could pin straight through the rolled bill, but the bills would then have a hole in them. I’ve seen it both ways, I just chose with no hole.
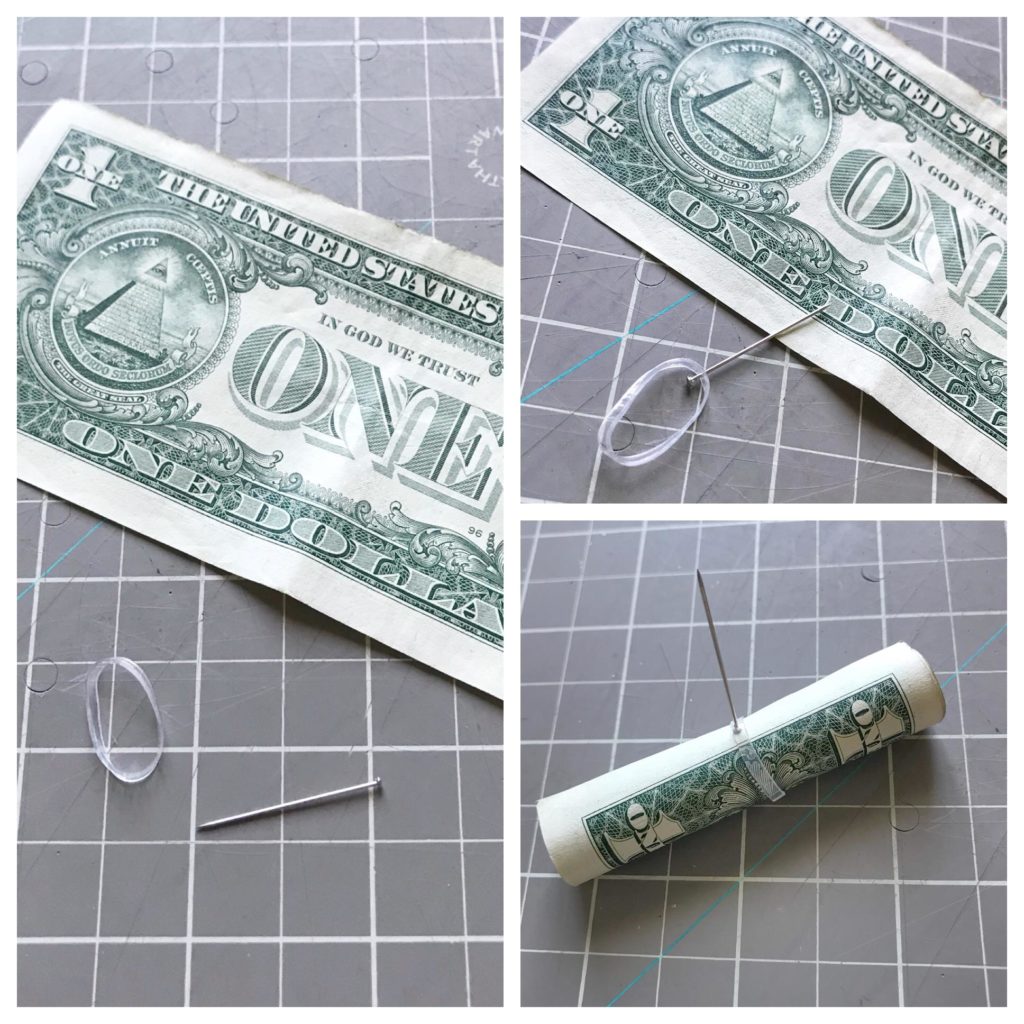
- TIP: Watch to make sure you are rolling the bills the same way.
Step 5
Insert the rolled bills into the foam.
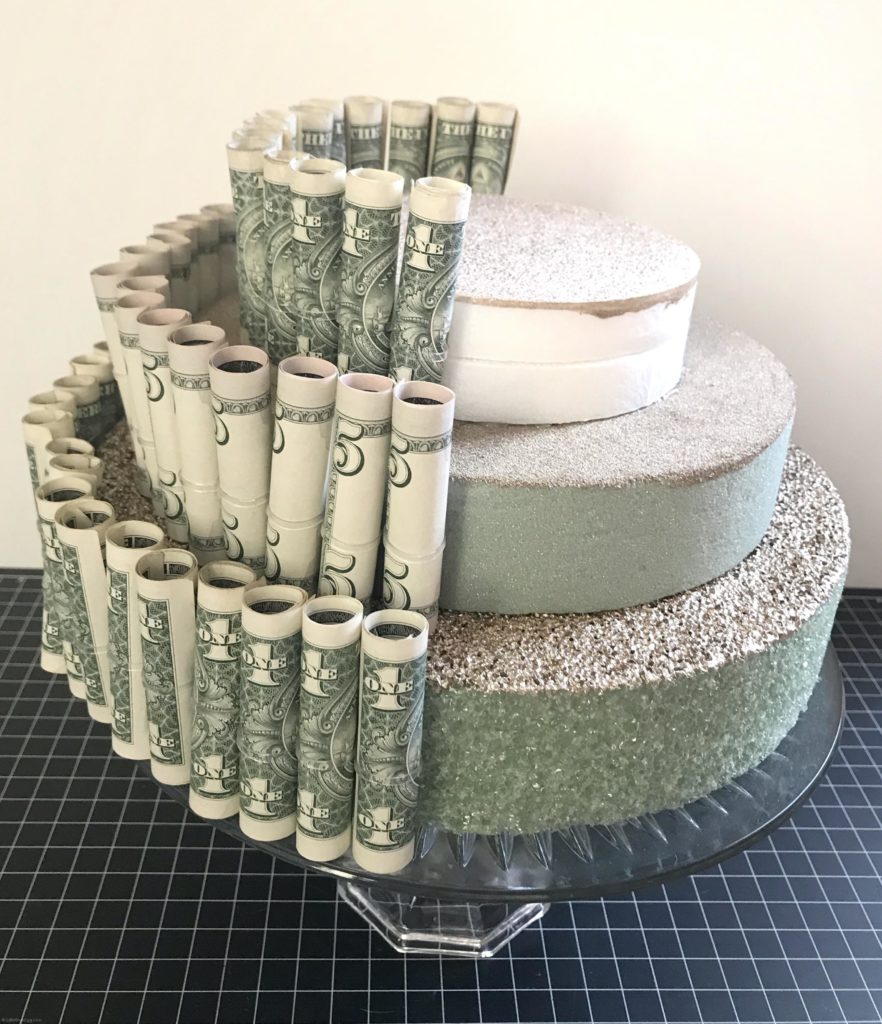
- TIP: Start from the top layer down when inserting into the foam. Promise me, it will be better in the end. I learned the hard way.
Step 6
Wrap the bills in ribbon. This will nicely cover the clear bands. I secured with glue dots.

Step 7
Glue to the cake plate. I added a small line of glue on the outer rim of the plate for security. Less stress on myself while we were in the car to the Grad Party.
Step 8 (optional)
Add a topper. A small vase of flowers or a Congratulations sign made out of cardstock would be a great addition. I added a disco ball drink cup, simply because I thought it was cute. Be creative.
Please Pin the picture below!

affiliate links included

Shelley, do you have any pictures? I would love to see them. I am planning on making one for my grandson’s graduation. Thanks.
How much was on your cake dollar wise?
Thank you so much for all the tips and ideas on how to make a money cake. My daughter and I love to give gifts that are different and not seen at many parties. We’re tired of just putting money in a card and giving it as a gift this is a great idea. Plus we like trying new arts and crafts.
I have made a few of these. I use paper clips to keep the dollars rolled. I did use a few straight pins but only put it in the back part of the rolled dollars. I did not want damage the money. I used 2 green round styroform, also use a half moon styroform for the top. That makes a nice contrast from the 2 round. I use rubber bands to hold all the dollars and hide it with ribbon. Hope this will helps! Doing a few I have learned a few more tricks.
Any suggestions of money denominations if you only want to use 60.00 for a 3 tier
I used $1 and $5 bills but the smaller the cake rounds the less bills needed ;).
A pen or pencil ✏works too.
I just made this for my grandson’s birthday. I bought a plastic charger from Michael’s and glued a small glass cylinder I had from candle. I painted charger same color as styrofoam for consistency. I coordinated striped ribbon. I added a Happy Birthday for topper. Your instructions were very helpful. I will make again for other occasions. Thank you 🙏
Is it real money?
I used money as it was a gift. But you could certain use fake money and have has a fun decoration!
What you use to roll your money?
I just rolled by hand, trying to keep them even. But using a pencil would work for consistency sake.
What is the height on the round styrofoam?
I used 4.8 inch, 8-inch, and 10-inch circles that all seem to vary in height. I think 2 inches might have been the tallest.
Thank you for doing this and adding the instruction in details. The money, the pins, the forms, the stand and more very helpful. It maid is easier to fellow and play around with. Great Job☆☆☆☆☆
thanks!
How many bills did that take to make the 3 tier money cake
It really depends on how tightly you roll the bills. I figured out quickly a tight roll meant more $ (that’s why it is mostly $1 bills). Start with 50 and see how far around the circles you can get. I kept adjusting as I went.
Tape the dollars together (double sided) and stick to the cake.
How did you do it without the pin
Hello. I only used the pin to poke into the foam circles for stability. I couldn’t figure another way to keep the project stable with so many pieces. Sorry, I can’t be of more help.
Thank you for the tip with the rubber band and pin. I tried pushing the pin through the money. Got the holds in the money. And it bent the bill in the middle. You give some good tips thank you